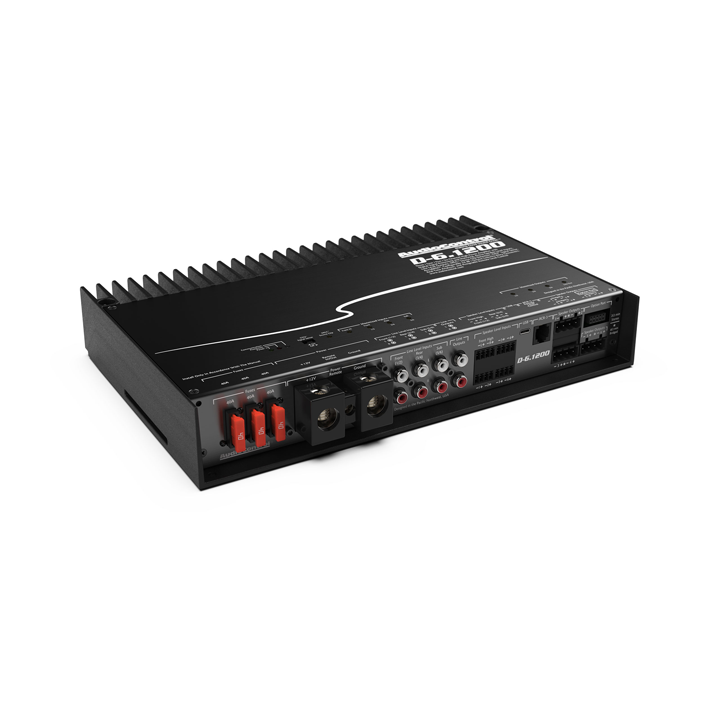

That small light on the amplifier switching from blue to red is not a malfunction. It is the amp doing exactly what it was built to do, cutting power to itself before something inside it burns. Protect mode is a warning, not a verdict, and most of the time the amplifier is perfectly healthy while something else in the install has gone wrong.
The frustrating part is that a single red LED gives you almost no information about which of nine or ten different faults triggered it. So people start swapping parts at random, buy a replacement amp, wire it in, and watch the same light come on again. The faster path is to read the pattern first, then test in a fixed order.
Read the Pattern Before You Touch Anything
When the amp goes into protect tells you more than the fact that it did. Write down the behaviour before you pull a single wire, because it eliminates half the possible causes immediately.
| Symptom pattern | Most likely causes |
|---|---|
| Protect the moment you turn the key | Shorted speaker wire, internal failure, dead short at the output |
| Amp turns on, plays a few seconds, then shuts off | Impedance too low, shorted voice coil, weak remote signal |
| Protect only at high volume | Voltage drop, impedance mismatch, clipped input signal |
| Protect after 15 to 30 minutes of play | Thermal overload, restricted airflow |
| Random protect over bumps | Loose ground, chafed power wire, intermittent short |
| Protect with a hot chassis you cannot hold | Thermal, almost certainly |
| Protect with a cool chassis | Electrical, not heat related |
Keep that list nearby. Every test below is faster when you already know which half of the system to suspect.
The Isolation Test That Narrows It Down in Five Minutes
Before diagnosing individual causes, strip the amplifier back to bare essentials. Disconnect every speaker wire from the output terminals, leave power, ground and remote connected, and turn the system on.

If the red light disappears, the fault lives downstream in your speakers or speaker wiring. If it stays on, unplug the RCA cables too. Still on? Then the problem is in the power side or inside the amp itself. Those three outcomes send you down three completely different paths, and it costs nothing but five minutes to find out which one you are on.
1. Thermal Overload
Heat is the most common trigger, and the easiest to confirm. Touch the heatsink after the light comes on. If it is too hot to hold for more than a second or two, the amp hit its internal thermal limit, usually somewhere between 70 and 85 degrees Celsius.
Class D amps run cooler than Class AB but still need airflow across the fins. Amps mounted face down on carpet, buried under a seat, sealed inside a box, or stacked flat against another amp have nowhere to dump that heat. Mounting vertically against a rigid panel with a few inches of clearance on all sides solves most of these installs on its own.
The other heat source is electrical, not physical. An amp driving a load below its rated stability, or running with the gain cranked into constant clipping, generates far more internal heat than the same amp doing easy work. If the amp cools down and resets after 10 minutes, then trips again at the same point in the song, treat it as thermal and go looking for the reason it is working so hard.
Pro tip: let the amp cool completely, then run it at moderate volume with the trunk or hatch open. If it never trips, airflow is your problem. If it still trips at low volume, the heat is coming from the load or the signal.
2. Impedance Below the Amp's Stable Rating
Wiring subwoofers to a load lower than the amplifier can handle is the second most common cause, and it usually shows up as protect within seconds of the bass hitting. A 1 ohm stable monoblock wired to 0.5 ohms is being asked to push roughly double the current it was designed for.
Work out your final load on paper before you connect anything. Two dual 2 ohm subs can be wired to 2 ohms, 0.5 ohms, or 8 ohms depending on the series and parallel arrangement, and only one of those is right for your amp. The difference between those options is covered well in 4 ohm vs 2 ohm speakers, and matching that load correctly is the same exercise described in how to match your amplifier and speakers.
To verify, disconnect the speaker wires at the amp and measure DC resistance across the pair with a multimeter. Real world readings sit slightly below the nominal rating, so a 4 ohm sub typically reads 3.2 to 3.8 ohms, and a 2 ohm coil reads around 1.6 to 1.9 ohms. Compare what you measure against what your wiring diagram promised.
3. A Short in the Speaker Wiring
A single stray copper strand bridging two output terminals will put an amp into protect instantly, and it is invisible unless you look for it. The same goes for speaker wire pinched under a seat rail, run through a door grommet without protection, or stapled through a panel and grounding to bare metal.
Test each speaker run separately. Disconnect both ends of one pair, then measure resistance between one conductor and the vehicle chassis. Any reading other than open circuit means that wire is touching metal somewhere along its length. Repeat for the other conductor and for the other runs.
Pro tip: re-strip every speaker terminal and twist the strands tightly before reinserting. Loose strands are behind a surprising number of "the amp is broken" cases, and they cost nothing to rule out.
4. A Shorted or Blown Voice Coil
A speaker whose voice coil has shorted internally presents a near zero ohm load to the amplifier, which reacts exactly the way it would to a wiring short. This one hides well because the speaker may still make sound, just weakly or with obvious distortion.
Measure each driver individually at its own terminals with the wiring disconnected. A reading close to zero means the coil has shorted. A reading of OL or infinity means the coil is open, which usually will not cause protect but will explain a silent speaker. Anything in the normal range clears that driver.
Coils rarely fail without a reason, and the reasons are worth understanding before you replace the speaker and repeat the cycle. Thermal damage from sustained clipping, mechanical damage from over excursion, and long term heat soak all show up here. Several of them are laid out in hidden causes of speaker failure.
5. Supply Voltage Dropping Under Load
An amplifier that behaves perfectly at low volume and trips the moment the bass gets serious is usually starving. Most amps have a low voltage cutoff around 10.5 to 11 volts, and a tired battery, undersized power wire, or an alternator running at its limit can pull the rail below that on hard notes.
Put a multimeter on the amp's own power and ground terminals, not the battery, and watch it while the system plays hard with the engine running. A healthy install holds above 12.5 volts and rarely dips under 12. If you see it fall toward 11, the problem is upstream of the amp, and the mechanism behind it is explained in car audio voltage drops.
Fixes go in order of cost. Clean and tighten the battery terminals first, then check whether the power wire is genuinely the gauge it claims, then look at the Big 3 upgrade, and only then consider a higher output alternator. Sizing that last step properly is covered in what size alternator you need.
6. A Bad Ground
Ground faults produce some of the strangest protect behaviour, including amps that trip only over bumps or only when the AC compressor kicks in. A ground bolted to painted metal, an undercoated seat bracket, or a factory harness point simply cannot carry the current an amplifier needs.
The test takes thirty seconds. With the system playing loudly, measure DC voltage between the amp's ground terminal and the battery negative post. Anything above 0.2 volts means the ground is restricting current, and anything above 0.5 volts is a serious fault. A good ground reads under 0.1 volts.
Redo it properly rather than adding a second wire to a bad point. Sand the chassis down to bare metal, use the same gauge as the power wire, keep the run under 18 inches, add a star washer under the ring terminal, and seal the finished joint. The reasoning behind each of those steps is in the importance of proper grounding.
7. An Unstable Remote Turn-On Signal
Some amps interpret a fluctuating remote voltage as a fault and go straight to protect. This shows up as an amp that turns on then shuts off within a second or two, often repeatedly, in a pattern that looks almost like flickering.
Measure the remote terminal with the key on. It should sit within about half a volt of battery voltage and hold steady. If it reads 9 or 10 volts, the head unit's remote output is being asked to drive too many devices, or the wire is too thin for its length. A relay triggered by the remote lead and fed directly from the battery fixes this permanently.
Also check that the remote wire is not tapped from an accessory circuit shared with something else. Systems that trip when the wipers, blower, or brake lights come on are almost always sharing a circuit they should not be.
8. Clipped Signal and Gain Set Too High
Gain is not a volume control, and setting it by ear until it sounds loud is how most protect problems start. A heavily clipped waveform carries far more average power than a clean one, which overheats the output stage and can also send enough DC-like content into the speakers to trigger DC protection.
Set gain properly with a multimeter or oscilloscope instead of guessing, using the method in how to set amp gain with a multimeter. Turn bass boost off entirely while you do it, since boost applied on top of a correct gain setting will clip the amp all over again.
Head unit volume matters here too. Most factory and aftermarket units start clipping their own preamp output somewhere around 75 to 80 percent of maximum, and no amplifier can clean up a signal that arrives already distorted. What that distortion actually does is explained in what is clipping in car audio.
9. Internal Amplifier Failure
If the amp still sits in protect with speakers disconnected, RCAs unplugged, a verified ground under 0.1 volts, and 12.5 volts at the terminals, the failure is inside the chassis. Blown output MOSFETs and failed power supply sections are the usual culprits, often the aftermath of one of the eight causes above going unaddressed.
One quick confirmation: with the amp powered and no music playing, measure DC voltage across each speaker output pair. A healthy amp reads close to zero, typically under 0.05 volts. Several volts of DC on an output means the output stage has failed, and that same DC is what destroys voice coils, so do not reconnect speakers to it.
At that point the choice is repair or replace. Repair makes sense on higher end units where the board is serviceable and parts are available. On budget amps the labour usually exceeds the value, and the signs pointing toward replacement are worth reviewing in signs your car amp needs an upgrade. Whatever you install next, spec it against your real load rather than the number on the box, which is where the amplifier range at Elite Auto Gear is worth comparing on RMS ratings rather than peak claims.
Multimeter Reference Values Worth Memorising
| Measurement | Where to test | Healthy reading | Fault indication |
|---|---|---|---|
| Ground voltage drop | Amp ground to battery negative, playing loud | Under 0.1 V | Above 0.2 V |
| Supply voltage under load | Amp power and ground terminals | 12.5 V or higher | Below 11.5 V |
| Remote turn-on | Remote terminal, key on | Within 0.5 V of battery | Below 11 V |
| Speaker DC resistance | Driver terminals, disconnected | Near nominal rating | Near 0 or OL |
| DC offset | Speaker outputs, no music | Under 0.05 V | Above 1 V |
Working Through It Without Guessing
The order matters more than the individual tests. Check heat first because it is free, then isolate the speaker side, then the signal side, then measure the power and ground, and treat internal failure as the last conclusion rather than the first. Jumping straight to "the amp is dead" is what turns a loose ground bolt into an unnecessary purchase.
Most protect faults trace back to installation shortcuts rather than component quality, and the same shortcuts show up again and again across builds. Sanded ground points, correctly sized power wire, verified impedance, and gain set with a meter instead of an ear will prevent the majority of them before they ever happen. Several more of those preventable errors are collected in top mistakes to avoid in car audio installation.
Keep a cheap multimeter in the car and the diagnosis becomes routine. The red light stops being a mystery and starts being a starting point, and in most cases you will have the answer before you finish your coffee.